Hello parents! Welcome to my website! This site is a portal for you to keep tabs on your student. I will be posting updates of projects, pictures and videos of what your student is creating and learning!
PowerSchool Login Click Here
PowerSchool Tutorial Click Here
PowerSchool Login Click Here
PowerSchool Tutorial Click Here
|
Windmill Project
Introduction
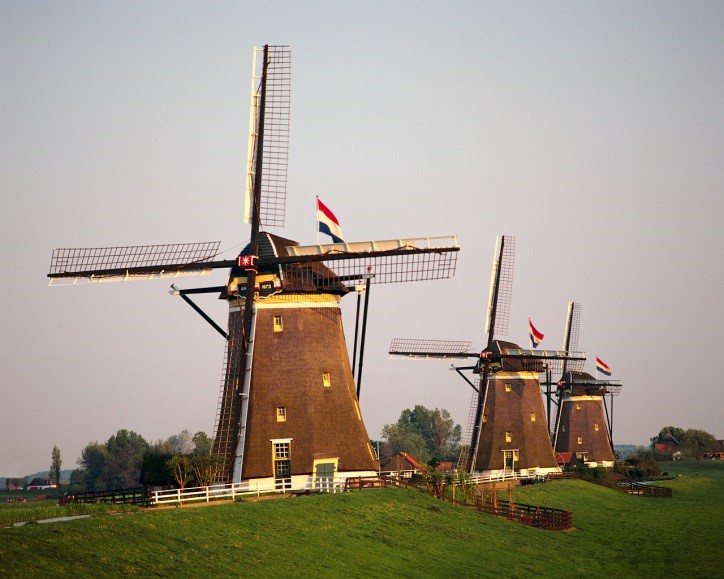
As your students know from science class or Energy and the Environment unit, a windmill converts wind energy to a useful mechanical energy. One real-world use of a windmill is to grind grain into flour. The rotary movement of the sail, turned by the wind, changes the direction of motion by 90º. |
|
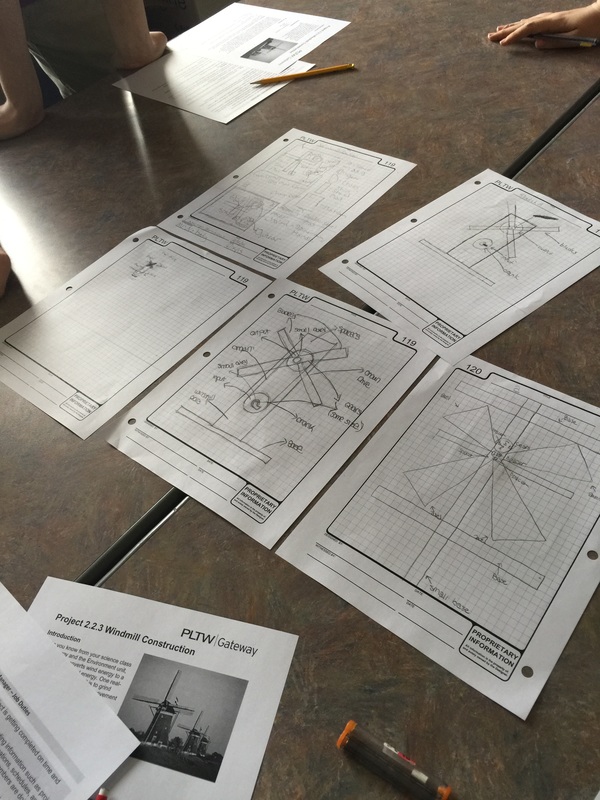
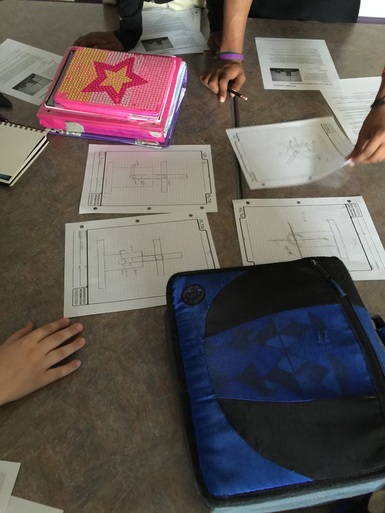
In this project the students will be constructing hand cranked windmills. The purpose of this lesson is to use the simple mechanisms they studied and built to construct a windmill. They will have constraints of Windmill A - Constant Speed/Torque and Windmill B More Torque/Less Speed. The students will work in their mini companies to complete each of the robotic tasks moving forward.
The students were given their teams for the rest of the year, along with their roles in the team.
The team roles as follows:
**UPDATED STUDENT WORK**
The students were given their teams for the rest of the year, along with their roles in the team.
The team roles as follows:
- Project Manager - In charge of time, problems in group, builds and any other issues that may arise.
- Mechanical Engineer - In charge of construction and builds.
- Software Engineer - In charge of software and coding for the automated robots.
- Electrical Engineer - In charge of wiring and working with software engineers to complete automation.
- Engineering Assistant - These people will be the jack of all trades. They will help out in every aspect of the builds.
**UPDATED STUDENT WORK**
|
|


Building Simple Mechanisims - Student Built Work
|
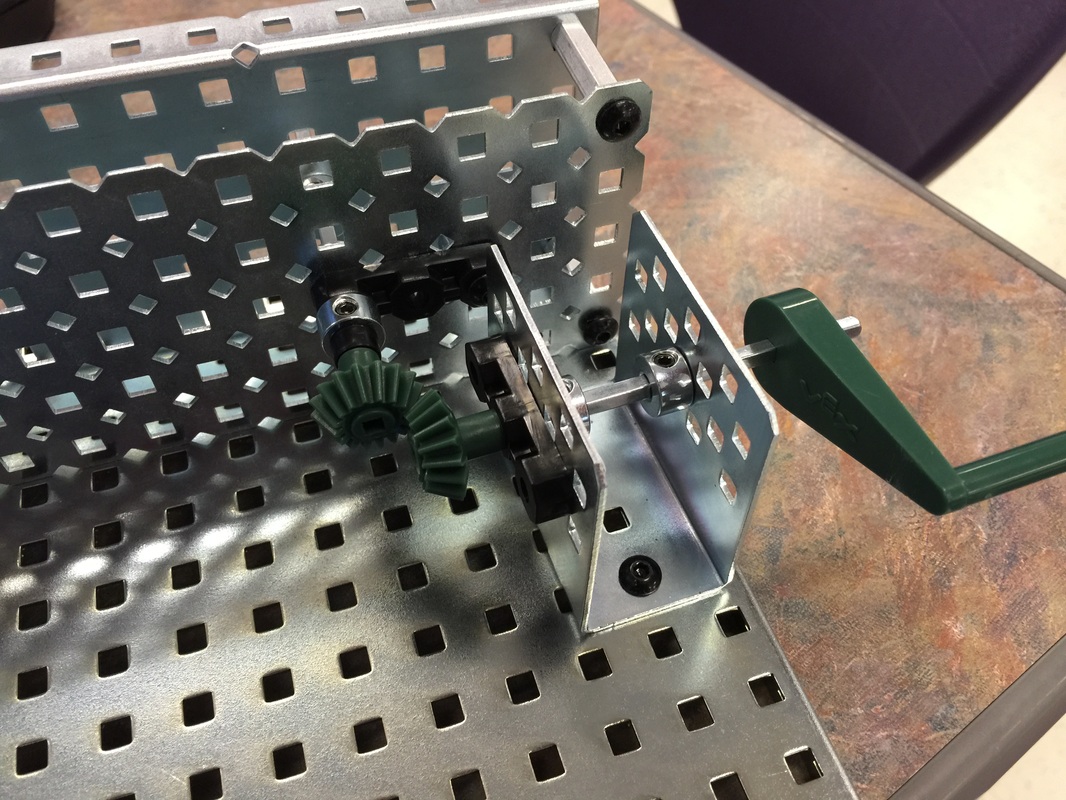
Bevel Gear
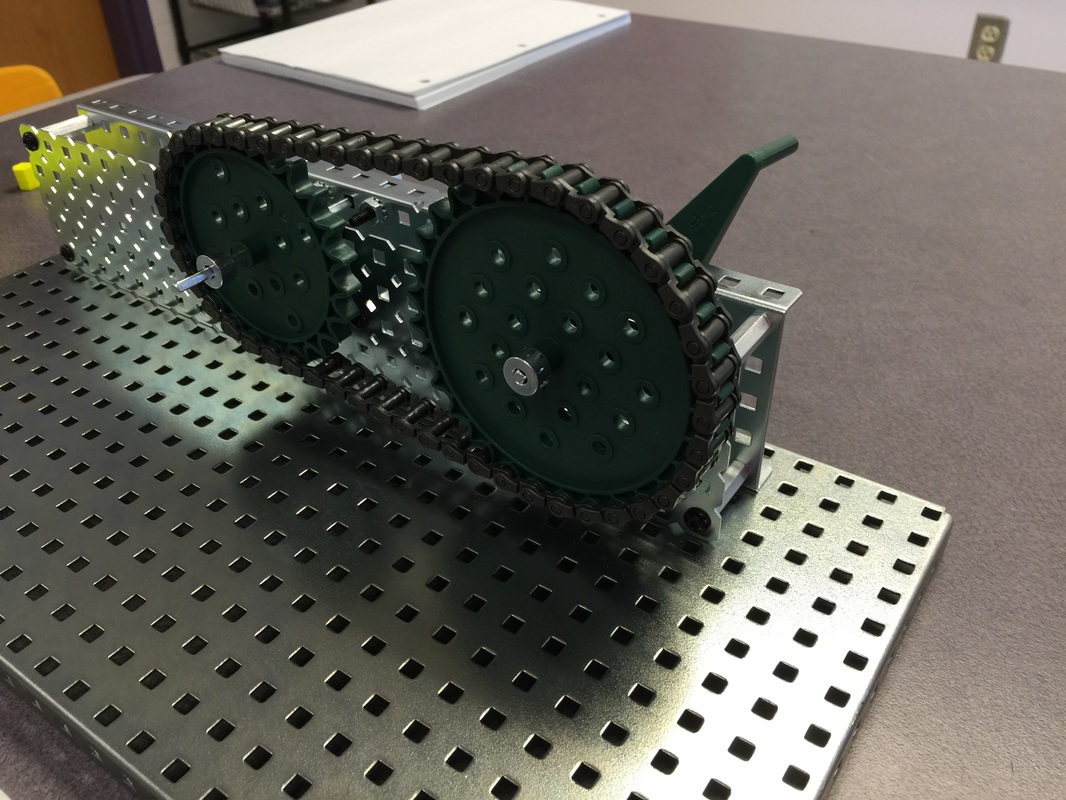
Chain Drive
|
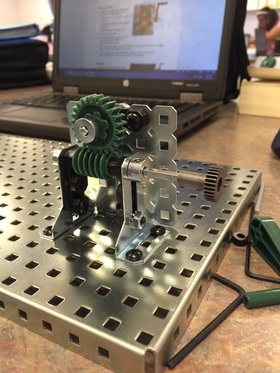
Worm and Wheel
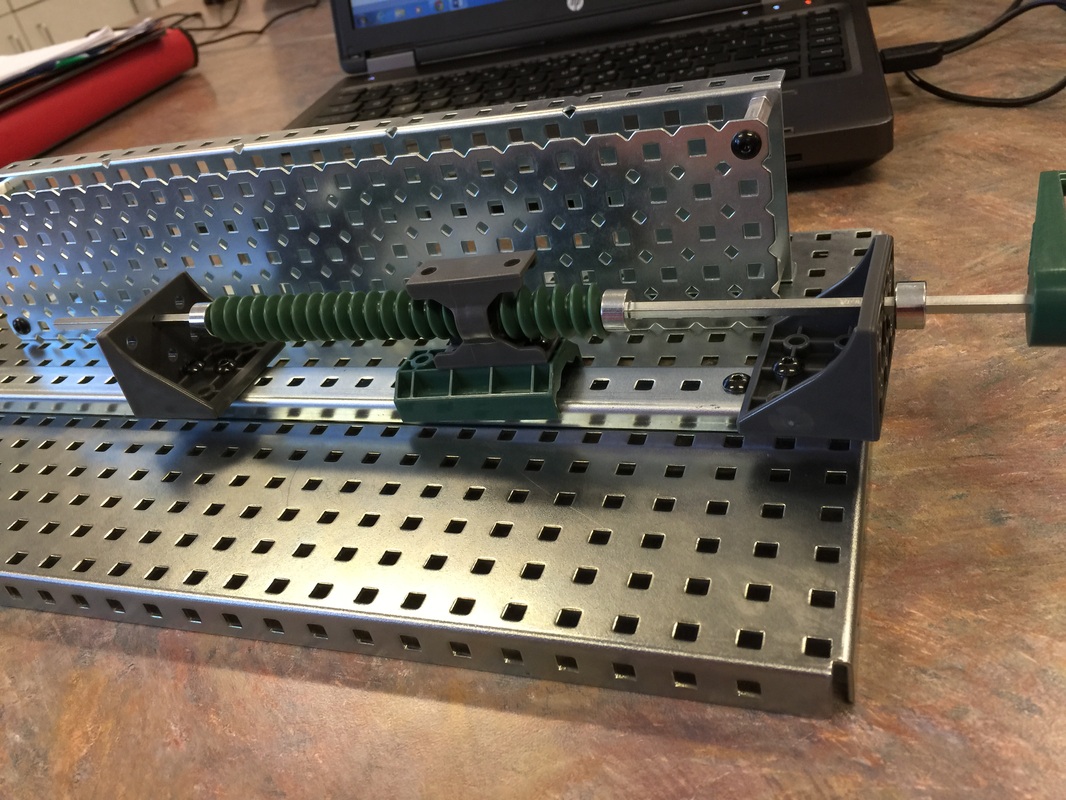
Leadscrew
|
|
Observing Mechanisms
In this lesson the students will begin to learn how simple mechanisms work. They will learn about Torque, Speed, and Force or Movement. They will investigate gear ratios and the impact that has on speed and torque. This lesson prepares them for the building of simple gears and machines. Using this gif, the students can see how gears with 'teeth' affect other gears in the chain. |

|
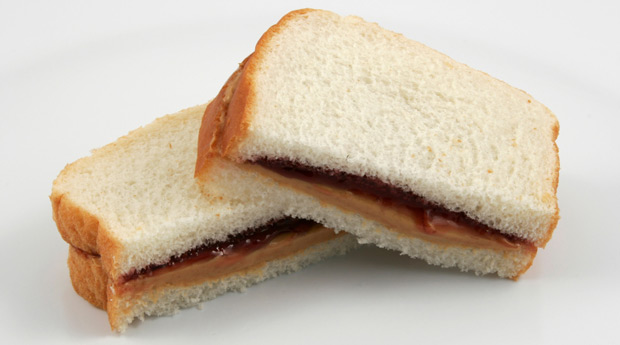
"Peanut Butter and Jelly" Algorithm
Can you write directions to make the perfect Peanut Butter and Jelly sandwich? The students in this lesson will write directions to program me, a "robotic alien", how to make the perfect PB&J Sandwich. The students will realize the amount of detail and effort it actually takes to make something as easy a sandwich. The kids will soon realize that programming a robot is very literal and time consuming. This will enable the children to think outside the box when it comes time to program an actual robot.
Can you write directions to make the perfect Peanut Butter and Jelly sandwich? The students in this lesson will write directions to program me, a "robotic alien", how to make the perfect PB&J Sandwich. The students will realize the amount of detail and effort it actually takes to make something as easy a sandwich. The kids will soon realize that programming a robot is very literal and time consuming. This will enable the children to think outside the box when it comes time to program an actual robot.
Robotics Introduction
Students are now beginning the Automation and Robotics portion of the class. In the introduction, the students are researching different types of robots and how they impact society. The students watch the following videos below to help introduce the lessons. These group of students at the University of Central Florida made and created 3D printed 'bionic' arm in the form of Ironman for the this young man.
Students are now beginning the Automation and Robotics portion of the class. In the introduction, the students are researching different types of robots and how they impact society. The students watch the following videos below to help introduce the lessons. These group of students at the University of Central Florida made and created 3D printed 'bionic' arm in the form of Ironman for the this young man.
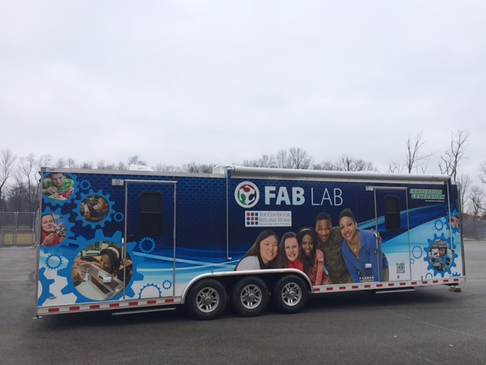
Fab Lab!
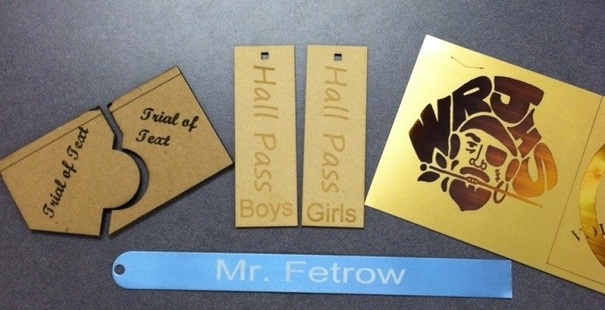
We are taking a two week break to introduce the students to the Moblie Fabrication Lab that is shared with the middle level schools throughout the district. During this time period, I will be introducing the students to the a Vinyl Cutter and a Laser Engraving/Cutter. The first project will be creating an image using software called Inkscape, those images will be engraved and cut into cardboard similar to the examples below.
Design A Playground
We are taking a two week break to introduce the students to the Moblie Fabrication Lab that is shared with the middle level schools throughout the district. During this time period, I will be introducing the students to the a Vinyl Cutter and a Laser Engraving/Cutter. The first project will be creating an image using software called Inkscape, those images will be engraved and cut into cardboard similar to the examples below.
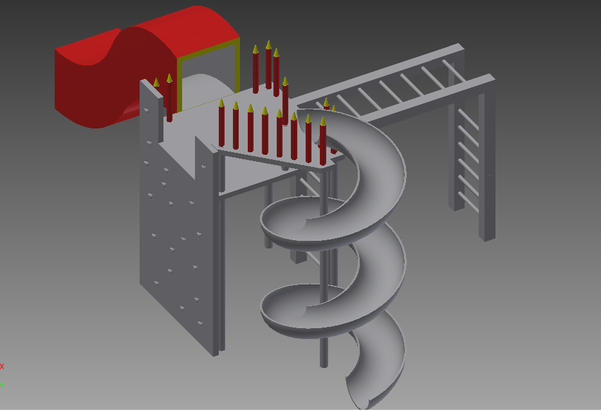
Design A Playground
- Students will be using all of their acquired knowledge over the past few weeks in order to complete a playground in 3D. The students will be learning how to make a folder structure in Microsoft Windows so Autodesk Inventor can recognize parts to create an Assembly. The students will be given 'blue prints' to create the parts. From those parts, they will create the following playground below. The students acquired knowledge will give them a good foundation for 3D modeling to use in the future.
Past Project (12/15 - 1/12)
- Furniture Project - The students will be designing and 3D modeling a piece of furniture when given certain criteria.
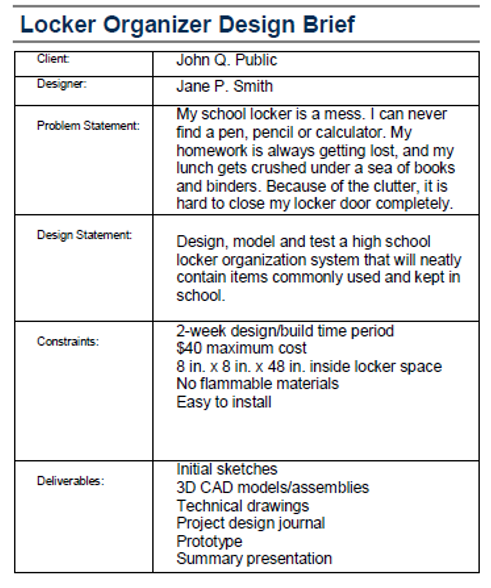
- The students will be using a derivative of the design process called a "Design Brief". This is document is a pseudo contract that shows the client on how they will be solving the problem assigned to them. Below is an example of a "Design Brief".
Past Project (11/17 - 11/21)
- The Coordinate System and Computer Modeling Fundamentals - This week the students are using the coordinate system to plot points in order to make their initials in 3D using Autodesk Inventor. The students are also getting to know Autodesk Inventor 2015. This program is a 3D modeling software that engineers use in the field to create objects in 3D. As a class we are working very methodically in order for each student to grasp the main concepts. After Thanksgiving break the students will begin more complicated 3D modeling projects in hopes of being able to use a real 3D printer in the Spring!

Past Project (11/12 - 11/14)
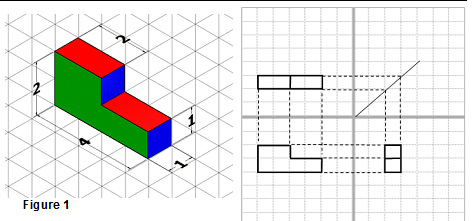
- ORTHOGRAPHIC vs. ISOMETRIC Drawing - The students will be learning the difference between ISOMETRIC (3D) Drawings and Orthographic (2D) drawings, as well as the correlation of the two drawings. They will be looking at objects in the room and drawing the views from the Top, Front and Side. This will teach the students the importance of drawing/sketching an object from all sides. Below is an example of an ISOMETRIC and ORTHOGRAPHIC drawings.
Past Project (10/27/14-11/11/14)
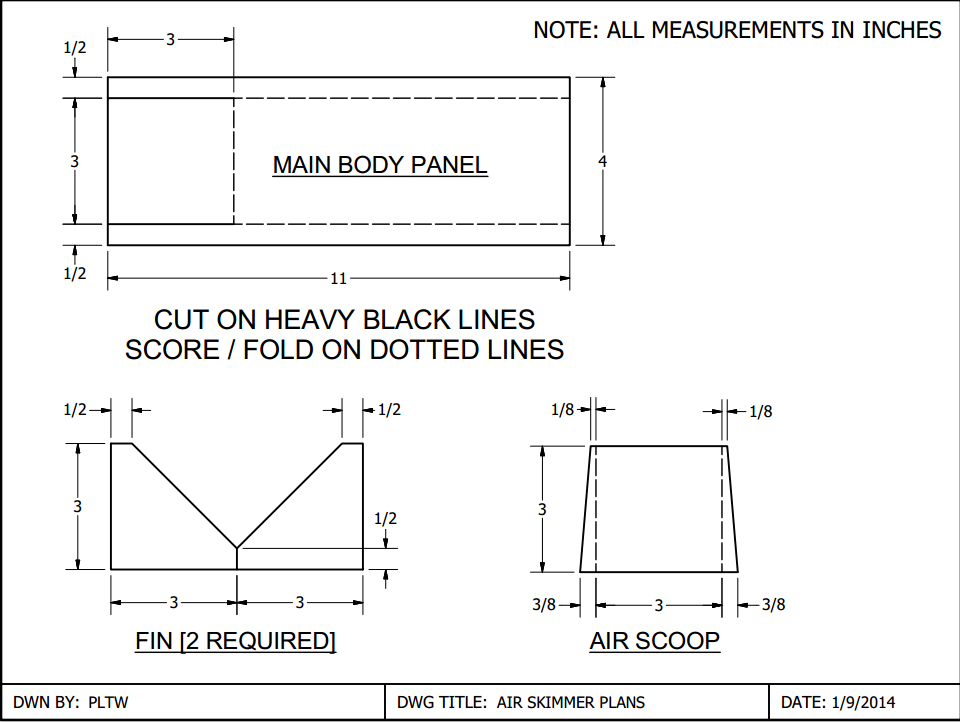
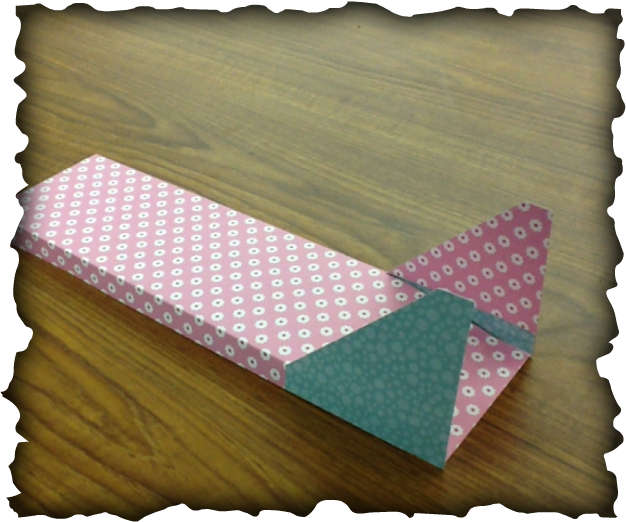
- PLTW Skimmers (1.3.4 Skimmer Measurement Labs) - The students will use their knowledge of measurement to build a "Skimmer". The Skimmer is a craft that skims along the ground using an air scoop, much like a hovercraft. The Skimmers are made out of color 60 lb. card stock paper. The students will need to precise and accurate in measuring, otherwise the Skimmer wont skim. Below are the blue prints of the Skimmer along with the "How To" videos the students will use to build their crafts! Once completed, we will race them in the hallway and see how far they skim!
Past Projects (10/13/14-10/27/14):
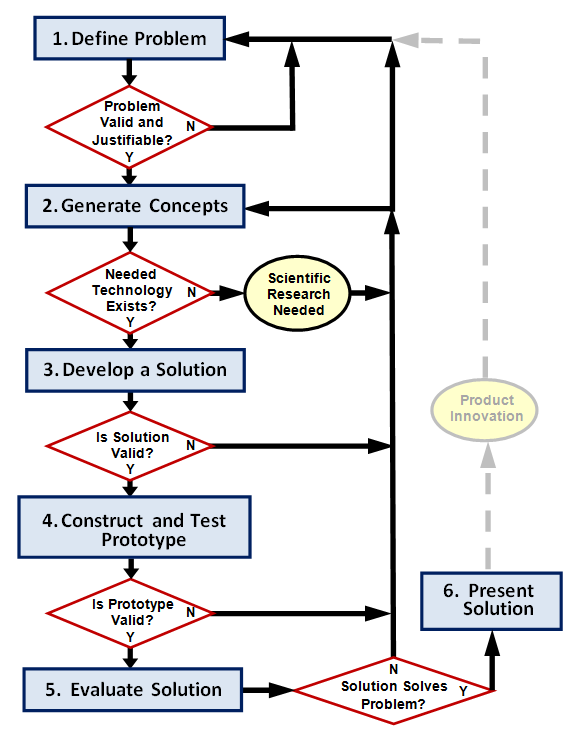
- PLTW (Project Lead the Way) Activity 1.2 - The Design Process - This process is the steps your student will use to solve every problem they are assigned to complete. The process is iterative process. Meaning they will have to reflect and refine their ideas over and over again until they reach his/her goal. The Design Process is most important part of Design and we will be spending the next two weeks going through this process. Please see the image below of the Design Process flow chart.